Are your dimmer switches not working the way they’re supposed to? In that case, you may have to consider dimmers repair in Las Vegas. There are certainly signs you can look out for that will tell you whether your dimmer switches need replacement or not.
In this article, we’ll give a few tips about how you can try and repair your dimmers on your own. However, we must warn you. While it does seem like a good idea to get a screwdriver and a pair of gloves and get right into it, the truth is that it is a lot more complicated than that. More often than not, your lighting issues need a qualified and licensed electrician to fix them. Dimmer switches, in particular, are a fairly complex bunch. They have many wires in them that only a qualified electrician can reconnect. If you don’t know what you’re doing, it’s best not to do anything and call an electrician, as you may expose yourself to electrocution and an electrical fire.
With that in mind, if you have a good idea what you’re doing, and the issue is simple enough, there are certainly things you can do to repair and replace your own dimmers.
What are dimmers?
The dimmer switch is a special type of switch that allows you to adjust the level of light in a room with the help of a knob. They have grown quite popular since they offer a great degree of control over the ambiance of a room. They are also environmentally friendly since they allow us to control the amount of energy consumed.
What are some common dimmer switch problems?
The dimmer buzzes
This is one of the most common dimmer switch problems. The constant buzzing of a dimmer can be caused by a variety of factors. It could be that the bulb has a problem, especially if the buzzing is coming from the bulb itself. In that case, changing the buzzing bulb may solve the problem. On the other hand, a buzzing sound coming from the dimmer itself typically indicates that the switch’s capacity is getting overloaded. You should be careful about how you use your dimmers.
The dimmer switch is not dimming
If your dimmer isn’t dimming the bulb all the way, or isn’t doing any dimming at all, then it’s probably because it has been overloaded. This means there’s too much energy in the circuit for the dimmer to handle and it isn’t doing its job very well.
You’ve replaced a bulb and the dimmer isn’t working
Perhaps you’ve replaced your light bulb, either because it was buzzing or for any number of other reasons, and the dimmer is still not working. This could be due to loose wiring in the dimmer. In that case, you should get a licensed and qualified electrician to do the repairs for you.
Dimmer Installation
Now, it’s important to repeat that you should never attempt any electrical repair work yourself if you don’t know what you’re doing, and certainly not without taking important safety precautions. If neither of these is true, then you should get a licensed electrician to do it for you. That said, here are the steps to replacing a dimmer switch on your own:
Step 1
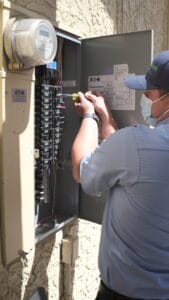
Start by turning the power supply off at the mains. Make sure there is absolutely no power coming out.
Step 2
Next, remove the plate on the dimmer by unscrewing the screws holding it together. Pull the dimmer switch out slowly in order to expose the wires.
Step 3
With the help of a screwdriver, remove the wires that are connected to the dimmer.
Step 4
Remove the old dimmer and connect the new dimmer to the old wires, making sure that the wire colors match.
Step 5
Tug at the wires lightly to confirm that they are indeed connected. You don’t want them to be loose as the dimmer will be fault and a safety hazard.
Step 6
Push the wires back into the wall, turn on the power supply and test the dimmer.
Make sure the dimmer works before you screw it back into place. If it doesn’t, turn the power supply off and check the connections again.

